LeftyBassist.com

The online home for southpaw bassists.
It is currently April 19th, 2024, 9:24 pm


Post new topic Reply to topic  [ 17 posts ] 
Author Message
 Post subject: building: creating a bass neck from rough lumber and parts
PostPosted: March 11th, 2008, 2:38 pm 
Offline
User avatar

Joined: March 10th, 2008, 7:00 pm
Posts: 1184
Location: Seattle, WA USA
this thread is a detail follow-on to the LeftyBassist 4-string bass build discussion. in that thread, the discussion covers the entire process of specifying the details for a bass build, and the details of actually building the physical parts are covered at a more general level.

in this thread, all of the juicy details of making a 4-string neck will be detailed for anyone who has interest in the subject.

since the specifications from the other thread (the target for this build) are not yet solidified, I'll note the preliminary specifications and update this to conform with the final specs when they are settled upon:

* flatsawn Eastern 'Hardrock' Maple neck shaft
* Birdseye Maple fretboard
* 21-fret with zero fret
* 12"R (305mm) fretboard radius, 1-5/8" (41.25mm) nut width
* dual action trussrod
* dual carbon fiber stiffening bars
* Ebony nut
* steel threaded inserts
* gloss finish

thanks for joining along!

all the best,

R

_________________
Moderator: Blueprinting and Bondo
Pickups: Honey Badger Pickups - Like Honey Badger Pickups on Facebook!
Basses: Regenerate Guitar Works - Like Regenerate Guitar Works on Facebook!


Top
 Profile  
Reply with quote  
 Post subject: Step 1 - choosing the materials
PostPosted: March 18th, 2008, 10:42 am 
Offline
User avatar

Joined: March 10th, 2008, 7:00 pm
Posts: 1184
Location: Seattle, WA USA
the first step in building a neck is to choose the right materials for the job. part of this requires an understanding of wood grain

quartersawn vs. flatsawn?

here's how ...

all the best,

R

_________________
Moderator: Blueprinting and Bondo
Pickups: Honey Badger Pickups - Like Honey Badger Pickups on Facebook!
Basses: Regenerate Guitar Works - Like Regenerate Guitar Works on Facebook!


Top
 Profile  
Reply with quote  
 Post subject: Step 2 - preparing the wood
PostPosted: March 18th, 2008, 10:43 am 
Offline
User avatar

Joined: March 10th, 2008, 7:00 pm
Posts: 1184
Location: Seattle, WA USA
the next step in building a neck is to prepare the neck shaft and fretboard woods for use

here's how ...

all the best,

R

_________________
Moderator: Blueprinting and Bondo
Pickups: Honey Badger Pickups - Like Honey Badger Pickups on Facebook!
Basses: Regenerate Guitar Works - Like Regenerate Guitar Works on Facebook!


Top
 Profile  
Reply with quote  
 Post subject: Step 3 - routing for stiffening bars and the trussrod
PostPosted: March 18th, 2008, 10:44 am 
Offline
User avatar

Joined: March 10th, 2008, 7:00 pm
Posts: 1184
Location: Seattle, WA USA
the next step in building a neck is to route for the graphite stiffening bars and trussrod

In preparation for this, the neck dimensions and perimeter must be sketched full scale onto the neck blank. I draw a reference centerline that is parallel to the jointed edge and then trace the neck outline from a template. I also use a 11/16" duplicating punch to position the tuning key locations as defined by the template - for visual reference in this thread, I also traced the hole locations. It is also critical to locate the zero fret position in reference to the neck heel.

Once the basic neck is traced it's time to position the trussrod and carbon stiffening bar channel locations. For this trussrod design, I will be routing a 3/16" wide x 3/8" deep channel that terminates 1" from the neck heel. The carbon stiffening bars will each get a 3/16" wide x 1/4" deep channel ... and the bars will also need to be shortened to the needed length for a 34" scale neck.

The image on the left shows the sketch details plus a side andgle view of the LMI dual action trussrod. I wasn't sure how many people have seen what this mystery device looks like, and this is as good a time as any to reveal the mysteries many people have wondered about. The image on the right shows where the trussrod and stiffening bars will be located, and note that these bars have not yet been cut to length

ImageImage


Update: 24 April 2008 -

I finally got to get back out in the shop tonight :D after endless things keeping me away :x

First step tonight was to get the end of the neck blank marked with the reference locations for centerline and channels. Here is one last sanity check before making any permanent modifications to the neck blank.

Image

Next I got the router table set-up to route a pair of channels that will receive the graphite stiffening bars. first step is to get the fence adjusted for the correct distance, and once it's dialed in I marked to outer diameter of the bit on the fence. I then transfer the channel start and stop locations onto the back side of the neck blank, and use these two sets of marks as a reference for start/stop locations. If you look carefully at the image below you can see that I have the channel end most towards the headstock lined against the router bit extent mark on the fence

Image

These channels are to for a 1/4" deep stiffening bar, so I route the first pass at 1/8" deep, adjust the router depth to 1/4" + 1/64" (to leave some room for epoxy on the bottom), and give it a second pass. After the first channel is completed, I move the fence to the location for the other stiffening bar and repeat the two-pass routing process. Here's the neck blank with both channels routed

Image

and a close-up

Image

Next I test-fit the stiffening bars into the channels before mixing the epoxy. Before installing the bars, I round off the ends of the bars so that they fit snugly into the channel - that big gaps disappears when this is done

Image

The epoxy is a slow cure 2-part mixture that is measured by volume. I mix the two parts for about five minutes and then pour it into the channels. After spreading the epoxy evenly into the channels and wetting the side walls I set the stiffening bars into the channel and gently press them to the bottom. I follow this by pouring a small amount of epoxy onto the top of the bars and then levelling (flooding) it into any remaining gaps. There usually is an air bubble or two that excapes, and I pop these before the epoxy has a chance to start curing. Here's the bars bathing in fresh epoxy

Image

in 24-48 hours I'll level the top face to remove any epoxy lumps and then route the truss rod channel similar to how the stiffening bar channels were routed.

Thanks for checking in tonight! :)


all the best,

R

_________________
Moderator: Blueprinting and Bondo
Pickups: Honey Badger Pickups - Like Honey Badger Pickups on Facebook!
Basses: Regenerate Guitar Works - Like Regenerate Guitar Works on Facebook!


Last edited by Rodent on March 17th, 2009, 4:15 pm, edited 1 time in total.
updated image links


Top
 Profile  
Reply with quote  
 Post subject: Step 4 - drilling tuner holes
PostPosted: March 18th, 2008, 10:45 am 
Offline
User avatar

Joined: March 10th, 2008, 7:00 pm
Posts: 1184
Location: Seattle, WA USA
The next major step in building a neck is to drill holes for the tuner keys.

I start this task by first trimming the straight edge on the top side of the headstock at a bandsaw and then sanding it smooth and flat. Once I have this done I draw a line from the center of each tuner hole perpendicular to the headstock edge, measuring to ensure that all of the tuners are equally spaced

Image

I next set-up a drill press with the proper diameter Forstner bit (in this case it is 11/16" dia) and set the fence so that the center point of the bit is at the hole center. I also have a mark on the fence that identifies the center of the bit - aligning the headstock line to this line will locate the hole precisely and eliminate the potential for drift when utilizing a center punch alignment

Image

Once aligned, I clamp the neck into position and drill the hole

Image
Image
Image

this is repeated for the remaining three tuner holes

Image

next I will drill the trussrod adjustment channel hole in the heel of the neck.

Image

if I was using a regular drill press this could be difficult to clamp the neck vertically, but thanks to the flexibility of a ShopSmith I drill this horizontally instead

Image

and the end result

Image

now it's time to test fit the trussrod

Image


all the best,

R

_________________
Moderator: Blueprinting and Bondo
Pickups: Honey Badger Pickups - Like Honey Badger Pickups on Facebook!
Basses: Regenerate Guitar Works - Like Regenerate Guitar Works on Facebook!


Last edited by Rodent on March 17th, 2009, 4:16 pm, edited 1 time in total.
updated image links


Top
 Profile  
Reply with quote  
 Post subject: Step 5 - slotting the fretboard
PostPosted: March 18th, 2008, 10:45 am 
Offline
User avatar

Joined: March 10th, 2008, 7:00 pm
Posts: 1184
Location: Seattle, WA USA
the next step in building a neck is to slot the fretboard

this is probably my last neck to cut the fret slots by hand with a reverse-pull handsaw, so it works nicely to save this particular build for the memories of how little fun it is to slot fretboards. future fretboards will be slotted by utilizing a slotting sled on my tablesaw instead of a handsaw in a miter box. outside of this tool change, everything else will remain consistent with this method ... except the time required to cut the slots (the tablesaw method will take just under five minutes :D to fully slot a fretboard blank)

to get started I screw a slotting miter box to my workbench so that it's firmly stable. I also locate the centerline and zero-fret/nut position on the fretboard blank and make sure that I have enough wood for the entire neck plus hang-over. In this image you can see (top to bottom) the miter box, reverse cutting handsaw, fret slot location template, and fretboard blank. if you follow the upper red arrow to the box, you can see a small pin in the side of the miter box - this pin fits tightly into a slot precision cut into the fret slot location template, allowing me to cut consistently accurate fret slots that are perpendicular to the fretboard reference centerline. there are also a pair of brass blocks on each side of the saw slot - these are for setting the cut depth, allowing me to maintain a consistent slot depth

Image

to get started I first load the slot template into the miter box and set the pin location for the zero-fret/nut slot, then slide the saw blade into the miter box slot, slip in the fretboard blank, and align the zero-fret mark and centerline locations with the template. the fretboard blank is held into place by several pieces of double stick tape

Image

once in place I cut the zero fret slot and check for accuracy

Image

if all is a 'go' I back-up to the slot forward of the zero-fret mark and cut the leading edge for the nut slot. I will follow-up later with a router and 1/8" bit to cut the proper width/depth channel for the nut. Once this is done there's 21 fret slots to cut - about 30 minutes of work with a Maple fretboard, and up to 60 minutes if the wood is waxy like Cocobolo or some of the Rosewoods

Image

when all is done, I re-cut each slot to be sure that I have an even bottom in all the slots. here's the completed board 30 minutes after I initially aligned the fretboard in the miter box

Image

and a close-up of what I consider to be my standard grade birdseye Maple ... not too bad, eh? ;)

Image


from here I'll let this board sit for a week to stabilize itself, and then I'll run it thru the drum sander to fine-tune its flatness and thickness before gluing the blank onto the neck shaft

all the best,

R

_________________
Moderator: Blueprinting and Bondo
Pickups: Honey Badger Pickups - Like Honey Badger Pickups on Facebook!
Basses: Regenerate Guitar Works - Like Regenerate Guitar Works on Facebook!


Last edited by Rodent on March 17th, 2009, 4:17 pm, edited 1 time in total.
updated image links


Top
 Profile  
Reply with quote  
 Post subject: Step 6 - shape the neck shaft and attach the fretboard
PostPosted: March 18th, 2008, 10:46 am 
Offline
User avatar

Joined: March 10th, 2008, 7:00 pm
Posts: 1184
Location: Seattle, WA USA
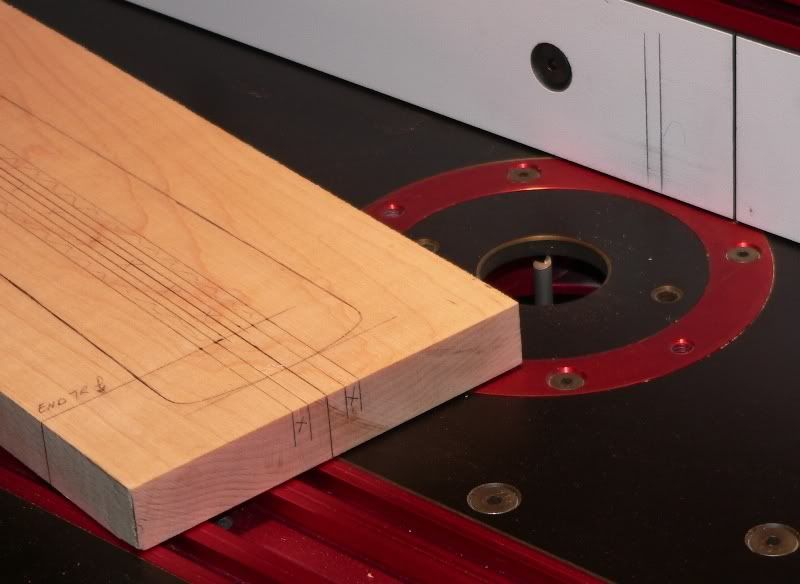
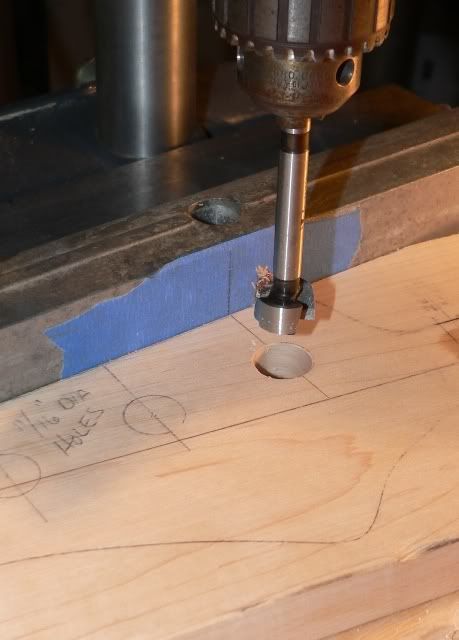
the next step in building a neck is to rough cut the neck shaft in preparation for shaping the outer profile to the dimensioned shape. I do this at the bandsaw by cutting just outside of the finished size lines.

Image

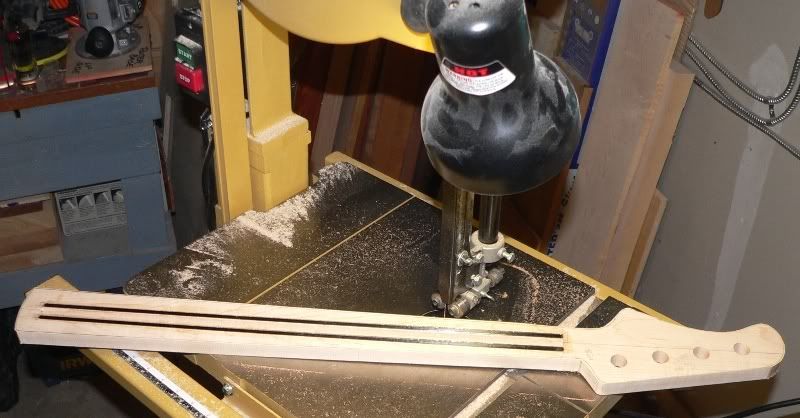
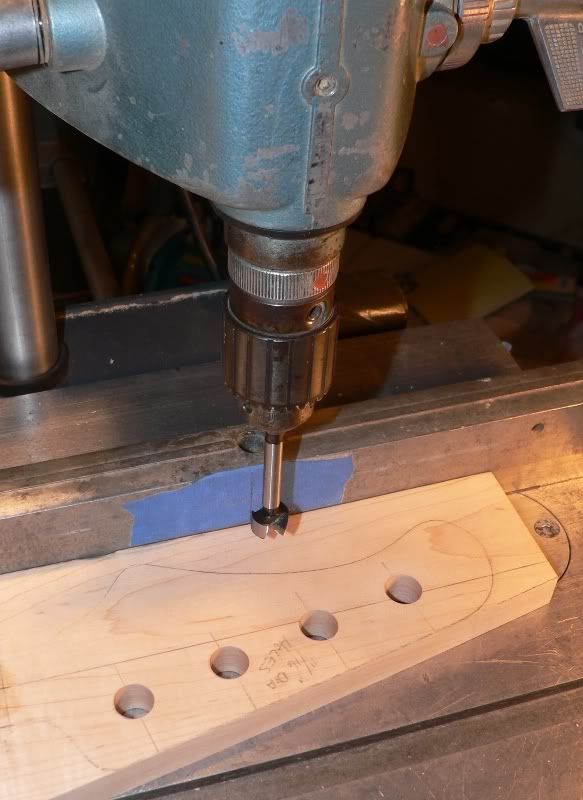
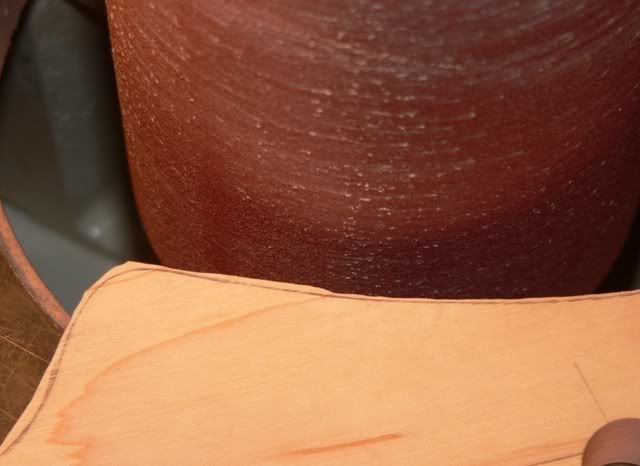
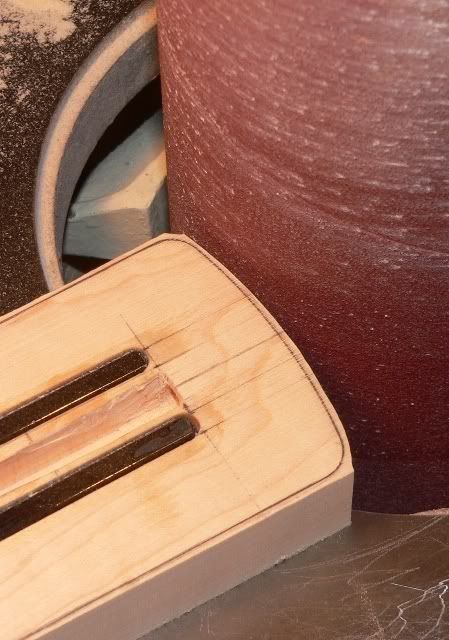
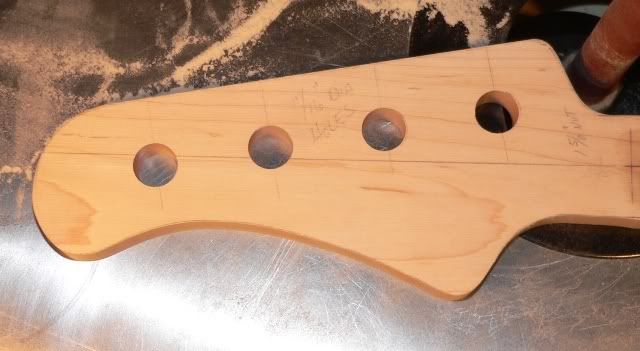
Next I detail the headstock shape and heel curvature with an oscilating drum sander before sanding the edges straight with a free-standing belt sander. You can see the rough cut is relatively close, but definitely not anything close to what you'd expect for a finished neck. In the process of sanding I'll utilize multiple drume sizes from 4" dia (shown) down to 3/4" dia for some of the tighter places on the headstock

Image
Image
Image

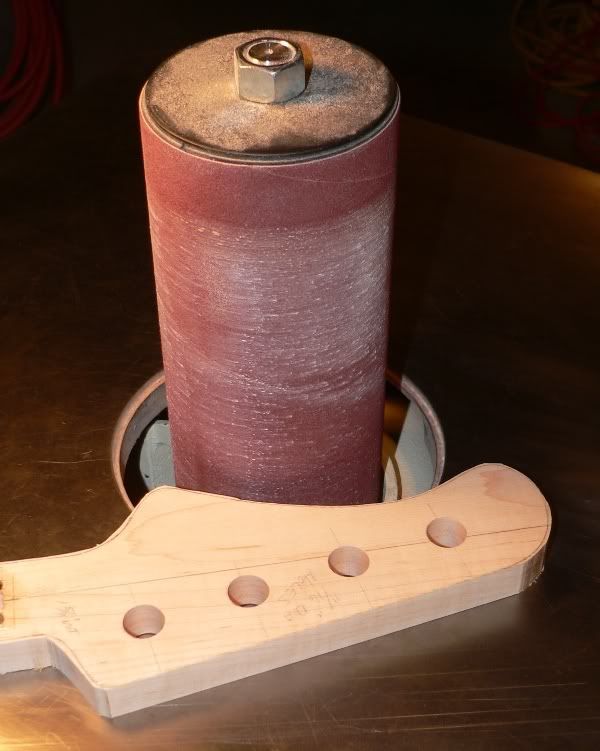
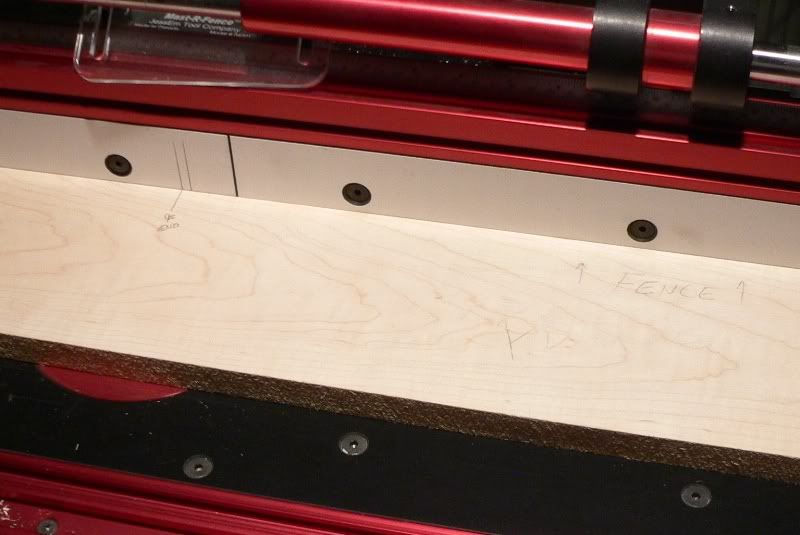
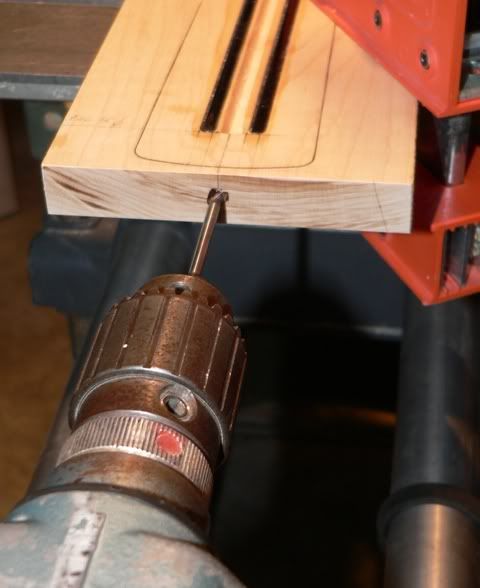
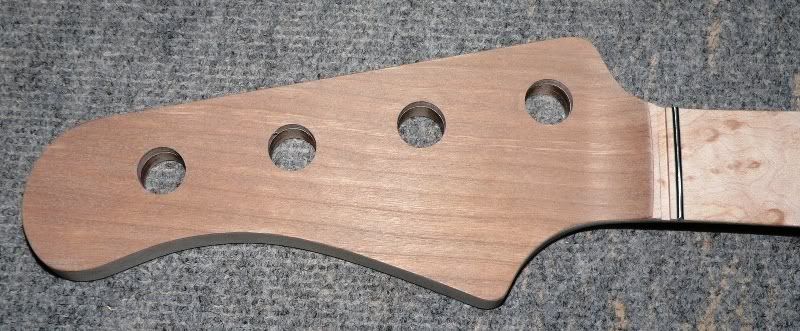
Here's the headstock with the edge line detail sanded

Image

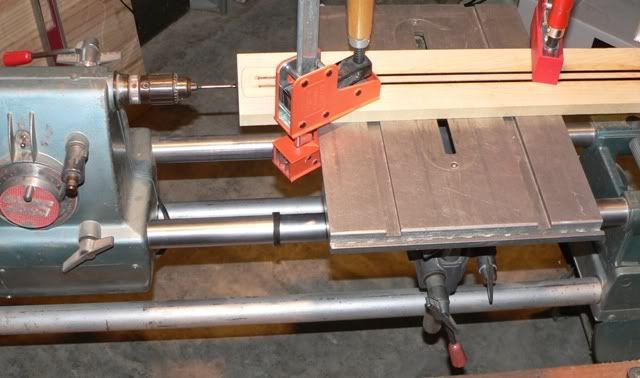
Once the heel is close to the finish outline, I start giving it a test fit to the body joint - I definitely don't want to take too much wood away and leave a loose fitting joint! I think this is just right

Image

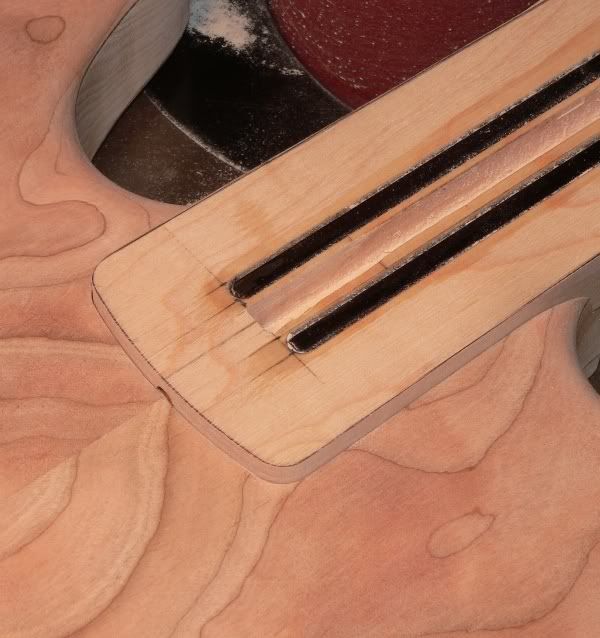
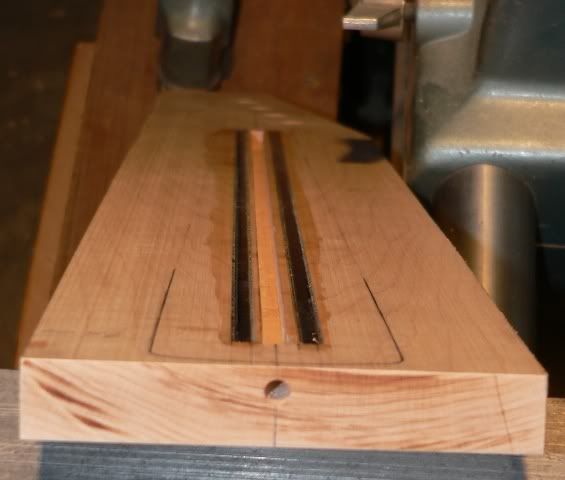
As you can see, the body still needs a trussrod adjustment slot ... this will be taken care of at a later time


When all of the detail sanding is complete and everything fits to perfection, I'll attach the fretboard blank to the detailed neck shaft (remembering to first insert the trussrod! don't ask me how I know this is important :? )

Before attaching the fretboard, it's also important to veryif that the trussrod is workable in its full range of use. Here you can see that I have tightened it far beyond what would be done for neck adjustments - so it's a go to glue on the fretboard

Image

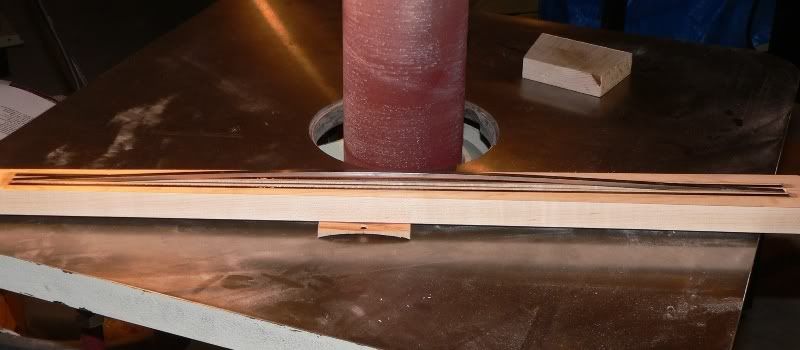
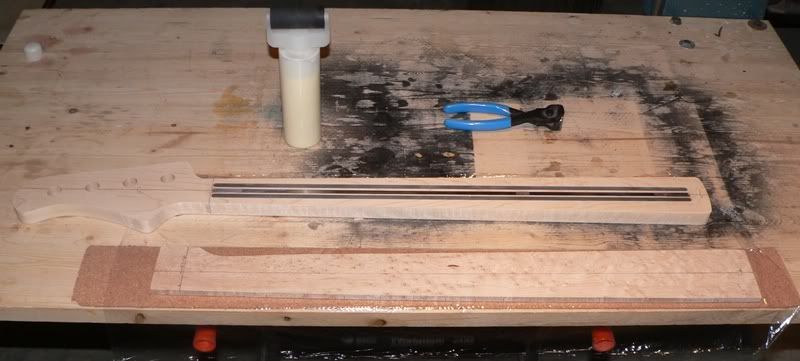
Since this is a Maple neck shaft mating to a birdseye Maple fretboard, the perfect glue of choice is Titebond Original. I preparation for gluing I run the fretboard and neck shaft thru the drum sander to remove any dings that might have occurred during construction so far. I then use 120 grit on an orbital sander to apply a non-uniform grit pattern to the sanding marks.

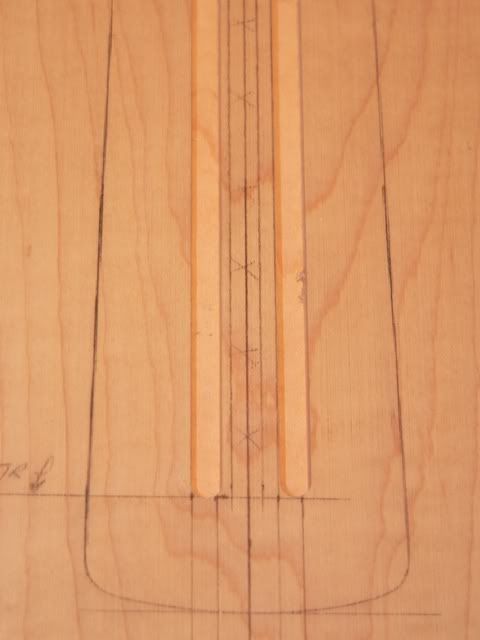
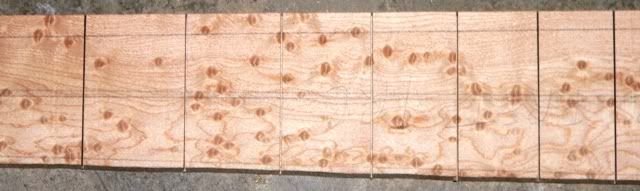
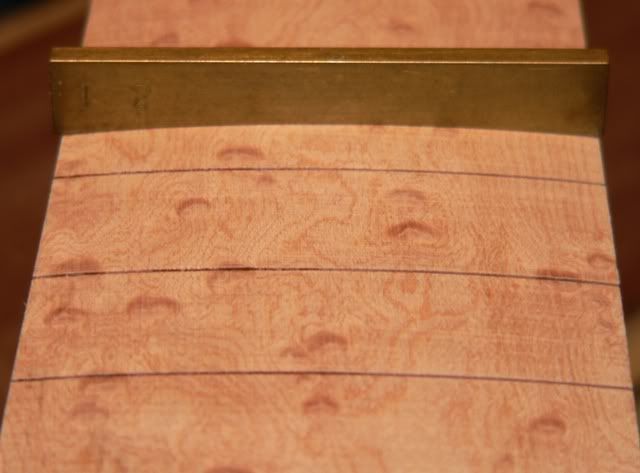
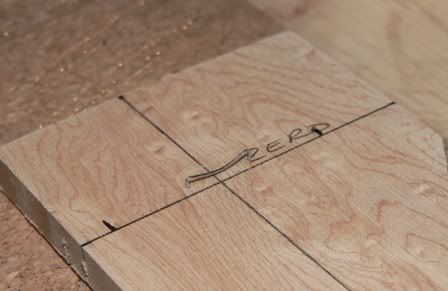
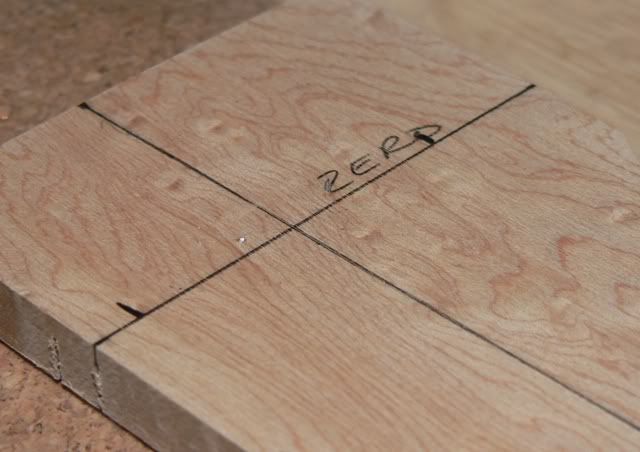
Next I remark the centerline and zero fret line on both the neck and fretboard gluing surfaces. I then apply a staple near the zero-fret end of the fretboard blank, and also at the heel end of the neck shaft. I will then snip the staple off leaving about 1/32" of stub remaining of each post - these will act as tracktion anchors that prevent the neck from slipping when first glued (lubricated) and fit together under clamping pressure. Here's the before and after on the fretboard staple

Image
Image

I also tape over the trussrod threaded blocks (both ends) to prevent glue seepage onto the threads when the clamps are applied

Image

Once these minor details are completed, it's time to glue. In the below image you can see the fretboard blank resting on top of a cork caul - this helps to even the clamping pressure across the entire fretboard - and that it's covered with a piece of plastic wrap (to prevent any glue that seeps out from sticking to the cork.) behind that is the neck shaft. you can also see that the bottle of glue has a spreader roller to speed up the glue application process and to minimize the amount of excess glue that gets applied

Image

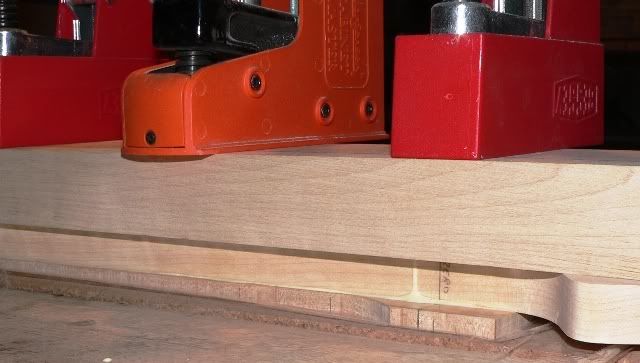
once the glue is applied I align the neck shaft and add another clamping calu on top of the neck - this again helps to evenly spread the clamping pressure across the glue joint. I then begin clamping at the middle and work my way to the ends, clamping with just enough pressure to firmly compress the cork and squeeze out some of the excess glue

Image

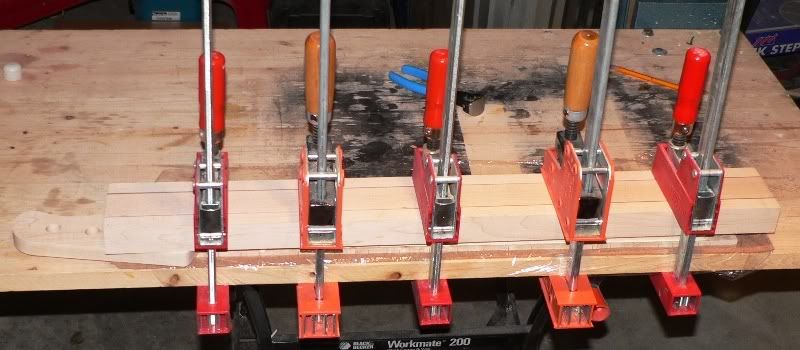
it's important to use the right amoount of clamping pressure, and to ensure that the pressure is distributed evenly. I also want to see a small amount of glue seepage all around the joint so I know that I have a good, wet contact all around

Image

this will dry under pressure overnight, and then I'll remove the clamps and hang it to continue drying out until the moisture content added by the glue perspires off and stabilizes.

that's it for this step of the process - it's quite a lot of work for a single step ... the next one will be significantly less work, but will really start to transform the look and feel

all the best,

R

_________________
Moderator: Blueprinting and Bondo
Pickups: Honey Badger Pickups - Like Honey Badger Pickups on Facebook!
Basses: Regenerate Guitar Works - Like Regenerate Guitar Works on Facebook!


Last edited by Rodent on March 17th, 2009, 4:18 pm, edited 1 time in total.
updated image links


Top
 Profile  
Reply with quote  
 Post subject: Step 7 - radiusing the fretboard
PostPosted: March 18th, 2008, 10:46 am 
Offline
User avatar

Joined: March 10th, 2008, 7:00 pm
Posts: 1184
Location: Seattle, WA USA
the next step in building a neck is to radius the fretboard

I'll post more details on exactly what I did in this step once the garage is packed. until then I'll say that I attached the neck blank to my radiusing jig.

Image

I set the swing to a 12" radius, and 15 minutes of incrimental depth adjustments while swinging the neck back/forth later, I have a perfectly radiused fretboard

Image

all the best,

R

_________________
Moderator: Blueprinting and Bondo
Pickups: Honey Badger Pickups - Like Honey Badger Pickups on Facebook!
Basses: Regenerate Guitar Works - Like Regenerate Guitar Works on Facebook!


Last edited by Rodent on March 17th, 2009, 4:19 pm, edited 1 time in total.
updated image links


Top
 Profile  
Reply with quote  
 Post subject: Step 8 - thicknessing the headstock
PostPosted: March 18th, 2008, 10:47 am 
Offline
User avatar

Joined: March 10th, 2008, 7:00 pm
Posts: 1184
Location: Seattle, WA USA
the next step in building a neck is to thickness the headstock

here's how ...

all the best,

R

_________________
Moderator: Blueprinting and Bondo
Pickups: Honey Badger Pickups - Like Honey Badger Pickups on Facebook!
Basses: Regenerate Guitar Works - Like Regenerate Guitar Works on Facebook!


Top
 Profile  
Reply with quote  
 Post subject: Step 9 - carving the rear contour
PostPosted: March 18th, 2008, 10:48 am 
Offline
User avatar

Joined: March 10th, 2008, 7:00 pm
Posts: 1184
Location: Seattle, WA USA
the next step in building a neck is to carve the rear contour

here's how ...

all the best,

R

_________________
Moderator: Blueprinting and Bondo
Pickups: Honey Badger Pickups - Like Honey Badger Pickups on Facebook!
Basses: Regenerate Guitar Works - Like Regenerate Guitar Works on Facebook!


Top
 Profile  
Reply with quote  
 Post subject: Step 10 - side markers, threaded inserts, and pressing the f
PostPosted: March 18th, 2008, 10:48 am 
Offline
User avatar

Joined: March 10th, 2008, 7:00 pm
Posts: 1184
Location: Seattle, WA USA
the next step in building a neck is to install the side markers, threaded inserts, and frets

here's how ...

all the best,

R

_________________
Moderator: Blueprinting and Bondo
Pickups: Honey Badger Pickups - Like Honey Badger Pickups on Facebook!
Basses: Regenerate Guitar Works - Like Regenerate Guitar Works on Facebook!


Top
 Profile  
Reply with quote  
 Post subject: Step 11 - side dressing the frets
PostPosted: March 18th, 2008, 10:50 am 
Offline
User avatar

Joined: March 10th, 2008, 7:00 pm
Posts: 1184
Location: Seattle, WA USA
the next step in building a neck is to side dress the frets

here's how ...

all the best,

R

_________________
Moderator: Blueprinting and Bondo
Pickups: Honey Badger Pickups - Like Honey Badger Pickups on Facebook!
Basses: Regenerate Guitar Works - Like Regenerate Guitar Works on Facebook!


Top
 Profile  
Reply with quote  
 Post subject: Step 12 - sanding the neck
PostPosted: March 18th, 2008, 10:51 am 
Offline
User avatar

Joined: March 10th, 2008, 7:00 pm
Posts: 1184
Location: Seattle, WA USA
the next step in building a neck is to finish sand the neck in prep for finishing

here's how ...

all the best,

R

_________________
Moderator: Blueprinting and Bondo
Pickups: Honey Badger Pickups - Like Honey Badger Pickups on Facebook!
Basses: Regenerate Guitar Works - Like Regenerate Guitar Works on Facebook!


Top
 Profile  
Reply with quote  
 Post subject: Step 13 - finishing the neck
PostPosted: March 18th, 2008, 10:51 am 
Offline
User avatar

Joined: March 10th, 2008, 7:00 pm
Posts: 1184
Location: Seattle, WA USA
the next step in building a neck is to apply the spray finish

here's how ...

all the best,

R

_________________
Moderator: Blueprinting and Bondo
Pickups: Honey Badger Pickups - Like Honey Badger Pickups on Facebook!
Basses: Regenerate Guitar Works - Like Regenerate Guitar Works on Facebook!


Top
 Profile  
Reply with quote  
 Post subject: Step 14 - buffing and polishing
PostPosted: March 18th, 2008, 10:52 am 
Offline
User avatar

Joined: March 10th, 2008, 7:00 pm
Posts: 1184
Location: Seattle, WA USA
the final step in building a neck is to buff and polish

here's how ...

all the best,

R

_________________
Moderator: Blueprinting and Bondo
Pickups: Honey Badger Pickups - Like Honey Badger Pickups on Facebook!
Basses: Regenerate Guitar Works - Like Regenerate Guitar Works on Facebook!


Top
 Profile  
Reply with quote  
 Post subject: Re: building: creating a bass neck from rough lumber and parts
PostPosted: May 24th, 2008, 6:36 pm 
Offline
User avatar

Joined: March 10th, 2008, 7:00 pm
Posts: 1184
Location: Seattle, WA USA
updated Step 7 to radius the fretboard

all the best,

R

_________________
Moderator: Blueprinting and Bondo
Pickups: Honey Badger Pickups - Like Honey Badger Pickups on Facebook!
Basses: Regenerate Guitar Works - Like Regenerate Guitar Works on Facebook!


Top
 Profile  
Reply with quote  
 Post subject: Re: building: creating a bass neck from rough lumber and parts
PostPosted: October 31st, 2008, 5:37 pm 
Offline
User avatar

Joined: March 10th, 2008, 7:00 pm
Posts: 1184
Location: Seattle, WA USA
it's been ages since I last offered an update on this. I still don't have shop space to work in :(

anyway, that aside, here's how that headstock is looking with a American Cherry veneer applied (dry wood, no naphtha to highlight the figure on this one - sorry)

Image

you can also see the nut slot is cut and the frets are installed (here, just the zero-fret can be seen)

this neck is headed off to the finishing shop for a satin finish with gloss headstock. images when I have it back in my hands

all the best,

R

_________________
Moderator: Blueprinting and Bondo
Pickups: Honey Badger Pickups - Like Honey Badger Pickups on Facebook!
Basses: Regenerate Guitar Works - Like Regenerate Guitar Works on Facebook!


Last edited by Rodent on March 17th, 2009, 4:20 pm, edited 1 time in total.
updated image links


Top
 Profile  
Reply with quote  
Display posts from previous:  Sort by  
Post new topic Reply to topic  [ 17 posts ] 


Who is online

Users browsing this forum: No registered users and 26 guests


You cannot post new topics in this forum
You cannot reply to topics in this forum
You cannot edit your posts in this forum
You cannot delete your posts in this forum
You cannot post attachments in this forum

Search for:
Jump to:  
Powered by phpBB © 2000, 2002, 2005, 2007 phpBB Group  
Design By Poker Bandits